Windows 10 è una delle versioni di Windows più attese da Microsoft. Sebbene Windows 8 abbia creato una nuova tendenza nel mondo del sistema operativo desktop, presentava alcuni problemi di design e prestazioni che erano l'obiettivo principale di Microsoft in Windows 10. Quindi, Windows 10 Final Build è stato rivelato il 29 luglio 2015, per Desktop come così come gli smartphone.
Comprendeva molte modifiche tenendo in considerazione i difetti di Windows 8. In realtà, è una versione avanzata di Windows, ma ci sono una serie di conseguenze che si verificano ogni giorno con utenti diversi.
Una parte importante di queste conseguenze sono gli errori che vengono fuori quando si cerca di svolgere un compito particolare. Diverse persone hanno ricevuto un messaggio di errore durante il tentativo di aprire diversi software e browser all'interno di Windows 10. Questo errore viene fornito con un messaggio di errore che dice che l'applicazione non è stata in grado di avviarsi correttamente (0xc0000005). Fare clic su OK per chiudere l'applicazione . Questo errore di solito si verifica con i browser Internet, ma non è limitato a questi. Qualsiasi applicazione all'interno di Windows può smettere di rispondere a causa di questo errore. Quindi, deve essere risolto per ripristinare il funzionamento di quei software essenziali.

11/12/2016: Gli utenti hanno segnalato che i metodi elencati di seguito funzionano anche su Windows 7.
Motivo alla base dell'errore di Windows 10 0xc0000005:
Esistono diversi motivi noti per cui questo errore disturba le operazioni di vari software in Windows 10. Uno di quei motivi che sono considerati una delle cause principali è un programma antivirus di terze parti che causa conflitti con i file eseguibili e influenza le loro operazioni. D'altra parte, i registri possono essere danneggiati a causa di malware e virus che causano il comportamento anomalo dei programmi. A volte, i driver hardware difettosi possono anche essere il colpevole che causa questo errore.
Soluzioni per correggere l'errore di Windows 10 0xc0000005:
Sulla base dei motivi sopra menzionati, le soluzioni sono semplici. Quindi, segui i seguenti metodi per sbarazzarti di questo frustrante messaggio di errore.
Ripara i file di sistema danneggiati
Scarica ed esegui Restoro per scansionare e ripristinare i file corrotti e mancanti da qui , una volta fatto procedere con le soluzioni di seguito. È importante assicurarsi che tutti i file di sistema siano intatti e non danneggiati prima di procedere con le soluzioni seguenti.
Metodo n. 1: riparazione del programma antivirus
I programmi antivirus possono influenzare i file eseguibili di numerosi programmi. Quindi, per risolvere questo problema, è necessario disabilitare il programma antivirus di terze parti per verificare se è stato il colpevole o meno. Tieni presente che la disabilitazione dei programmi antivirus può causare alcune gravi minacce al tuo computer quando connesso a Internet.
Puoi anche fare affidamento sul software di sicurezza di Windows, ad esempio Windows Defender . Ha le stesse funzionalità di qualsiasi altro antivirus. Puoi disabilitare l'antivirus accedendo alle sue Impostazioni e disattivando lo scudo.

Dopo che è stato disabilitato, controlla di nuovo l'errore. Se il problema persiste, passa al metodo successivo.
Metodo n. 2: correzione dei registri
Il registro è il database centrale di Windows che viene costantemente utilizzato dal tuo PC per aiutarlo a leggere molti file e impostazioni diversi che deve essere eseguito. I registri possono essere danneggiati a causa di danni ad alcuni determinati file necessari per impilare tutto in posizione. Pertanto, la maggior parte degli esperti consiglia di assicurarsi di eseguire il backup del registro e di mantenerlo archiviato su una chiavetta USB convenzionale in modo da poter ripristinare il registro nello stato precedente in caso di danneggiamento. Tuttavia, se non hai eseguito il backup del registro, segui questi passaggi per correggere i registri al fine di risolvere l'errore 0xc0000005 .
1. Scarica il software di pulizia del registro da questo collegamento .
2. Dopo averlo scaricato, installalo utilizzando le impostazioni consigliate. Aprire il software al termine del processo di installazione.
3. Nell'interfaccia, fare clic sulla scheda Registro di sistema presente nel riquadro di sinistra e fare clic sul pulsante etichettato come Scansione per problemi . Inizierà la ricerca degli errori nel registro e quando la ricerca sarà terminata, verrà attivato un pulsante Risolvi il problema selezionato . Fare clic su quel pulsante e tutto sarà risolto.

Metodo n. 3: riparazione di driver difettosi
I driver sono i programmi software che aiutano il computer a comunicare con l'hardware ad esso collegato. Quindi, quando sono danneggiati, l'hardware tende a causare problemi . Riparare questi subacquei difettosi può aiutarti in molti modi. Segui i passaggi seguenti.
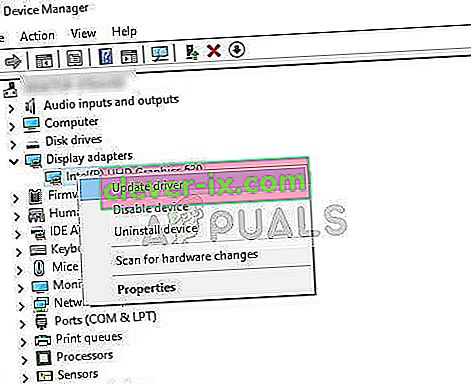
1. Aprire la Gestione periferiche da premere Win + X e selezionandolo dalla lista.
2. All'interno di Gestione periferiche, scorrere verso il basso per vedere se è presente hardware con un segno giallo. Se è presente, fai clic con il pulsante destro del mouse e seleziona Aggiorna software driver . Se hai installato i driver di recente, reinstallare anche quei driver.

3. Nella finestra che appare dopo, fare clic su Cerca automaticamente il software del driver aggiornato per consentire la ricerca e l'installazione automatica dei driver. Nel caso in cui, se hai scaricato i driver manualmente, fai clic sull'opzione sottostante per sfogliarli e installarli. Al termine del processo, controlla l'errore.

Metodo n. 4: correggi gli errori BCD
Questo metodo deve essere eseguito dagli utenti a proprio rischio. Questo ha funzionato per alcuni e non per altri. Sarà inoltre necessario riattivare Windows dopo aver eseguito i passaggi in questa guida.
- Tenere premuto il tasto Windows e premere X . Scegli prompt dei comandi (amministratore)
- Digitare " bcdedit" e premere INVIO. Se il percorso del caricatore di avvio di Windows è xOsload.exe, è necessario rimuovere alcuni file e riparare il BCD. Puoi vederlo nel campo PATH dopo aver eseguito il comando " bcdedit".
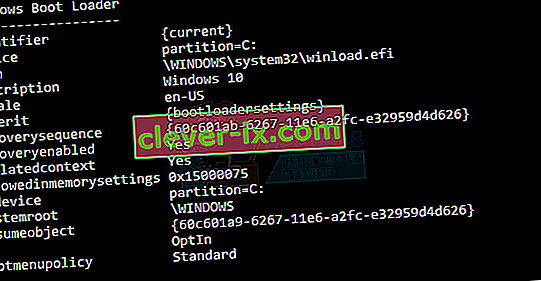
- Una volta fatto, esegui i seguenti comandi di seguito, alcuni potrebbero restituire non trovati ma ignorare gli errori e procedere fino all'ultimo. Assicurati di premere il tasto INVIO dopo ogni comando.

Canc D: \ Windows \ System32 \ xOsload.exe Canc D: \ Windows \ System32 \ xNtKrnl.exe Canc D: \ Windows \ System32 \ Drivers \ oem-drv64.sys attrib c: \ boot \ bcd -h -r -s ren c: \ boot \ bcd bcd.old bootrec / rebuildbcd
Metodo 5: controllo degli aggiornamenti di Windows
Gli aggiornamenti di Windows spesso contengono correzioni per alcuni bug e glitch, ma sono anche noti per lasciare il posto a nuovi problemi sui computer delle persone. Tuttavia, in questo passaggio, controlleremo eventuali aggiornamenti per il tuo sistema operativo perché Microsoft spesso risolve eventuali problemi derivanti dai loro aggiornamenti. Per farlo, segui la guida di seguito.
- Premere "Windows" + "I" per aprire le impostazioni di Windows.
- Nelle impostazioni, fare clic sull'opzione "Aggiornamenti e sicurezza" e dal lato sinistro, selezionare l' opzione "Windows Update" .
- Nella schermata successiva, fare clic sull'opzione "Verifica aggiornamenti" e verrà automaticamente richiesto a Windows di verificare la presenza di eventuali aggiornamenti disponibili.
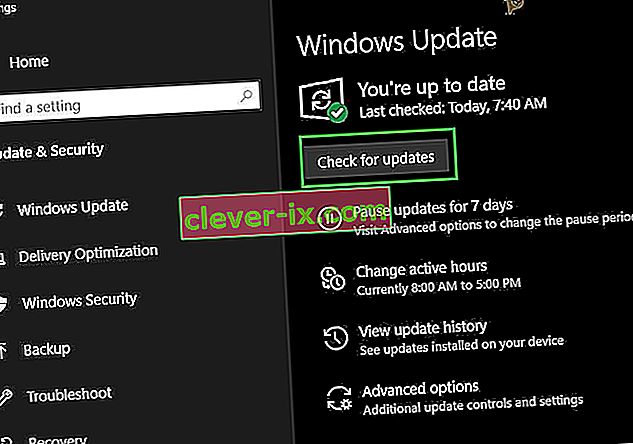
- Al termine del controllo degli aggiornamenti, fare clic sul pulsante "Download" per avviare il download e l'installazione di nuovi aggiornamenti sul computer.
- Dopo aver installato questi aggiornamenti, controlla se così facendo il problema è stato risolto sul tuo computer.


Metodo 6: ripristino del computer
Se hai appena iniziato a riscontrare questo problema, potrebbe essere attivato a causa di un'installazione difettosa del driver o anche a causa di un'applicazione canaglia che potresti aver installato sul tuo computer di recente. Pertanto, in questo passaggio, ripristineremo lo stato del computer a una data precedente e, si spera, questo dovrebbe risolvere il nostro problema se fosse dovuto ai motivi sopra indicati. Per fare questo:
- Premere "Windows" + "R" per aprire il prompt Esegui.
- Digitare "rstrui" e premere "Invio" per aprire la finestra di gestione del ripristino.
- Fare clic su "Avanti" e selezionare l' opzione "Mostra più punti di ripristino" .
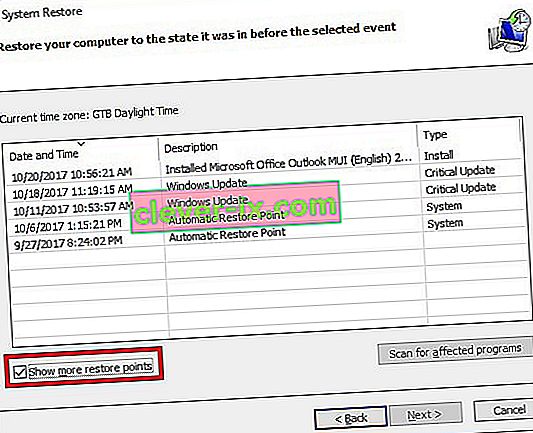
- Selezionare un punto di ripristino dall'elenco precedente alla data in cui si è verificato il problema.
- Fare nuovamente clic su "Avanti" e seguire le istruzioni sullo schermo per riportare tutto alla data selezionata.
- Al termine del ripristino, controlla se il problema persiste.


Metodo 7: abilita il firewall
In alcuni casi è possibile che l'errore venga attivato perché l'applicazione è sospetta o almeno se è stata contrassegnata come sospetta e Windows Firewall non è in esecuzione sul tuo computer per convalidare questo sospetto. Pertanto, in questo passaggio, ci assicureremo che Windows Firewall sia abilitato per eliminare questo errore. Per quello:
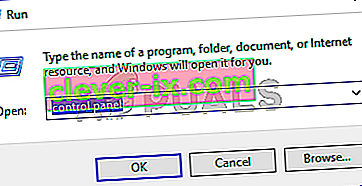
- Premere "Windows" + "R" per aprire il prompt Esegui.
- Digitare "Pannello di controllo" e premere "Invio" per avviare la classica interfaccia del pannello di controllo.
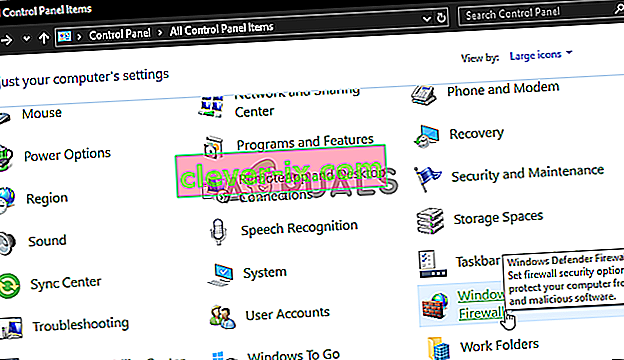
- Nel pannello di controllo, fare clic sull'opzione "Visualizza per:" e selezionare il pulsante "Icone grandi" .
- Dopo aver effettuato questa selezione, fare clic sull'opzione "Windows Defender Firewall" per avviare il firewall e quindi selezionare "Attiva o disattiva Windows Defender Firewall".
- Assicurati di selezionare "Attiva Windows Defender Firewall" per entrambe le opzioni disponibili per attivare il Firewall.
- Dopo aver effettuato questa selezione, salva le modifiche e chiudi la finestra.
- Dopo averlo fatto, controlla se il problema persiste.


Metodo 8: eseguire la scansione SFC
In alcune situazioni, potresti aver installato un driver non valido sul tuo computer o ad un certo punto, a causa di un errore di archiviazione, alcuni file di sistema o driver potrebbero essere stati danneggiati. Pertanto, in questa fase, eseguiremo una scansione completa del sistema per identificare eventuali driver privi di firme o per correggere eventuali anomalie nei file di sistema. Per quello:
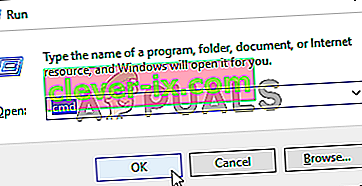
- Premere "Windows" + "R" per aprire il prompt Esegui.
- Digitare "cmd" e quindi premere "Maiusc" + "Ctrl" + "Invio" per fornire le autorizzazioni di amministratore. Esecuzione del prompt dei comandi
- Digitare il seguente comando all'interno del prompt dei comandi e premere "Invio" per eseguirlo.
sfc / scannow
- Let the computer scan for any broken or corrupted items and it should automatically replace them with working ones.
- Check to see if doing so fixes the error message.

Method 9: Disabling Data Execution Prevention
Data Execution Prevention is a program that prevents certain programs or executables from being able to run on your computer because it suspects that they might be viruses. Due to this prevention, sometimes, as a false alarm, legit applications might also face issues while trying to run on your computer. Therefore, in this step, we will be disabling this setting from the system configuration panel. For that:
- Press ‘Windows’ + “R’ to open the Run prompt.
- Type in “Control Panel” and press “Enter” to launch the classical control panel interface.

- Inside the Control Panel, click on the “View By:” icon and then select the “Large Icons” option.
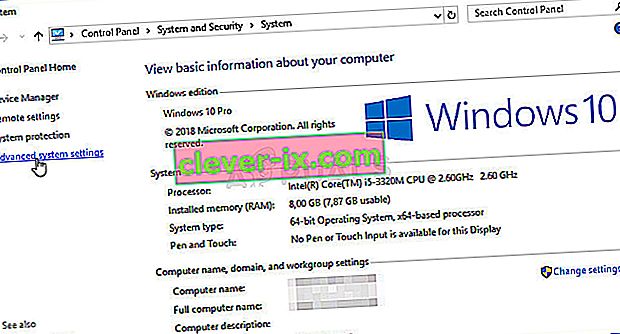
- After selecting Large Icons, select the “System” option.
- Click on the “Advanced System Settings” option on the left side of the screen.
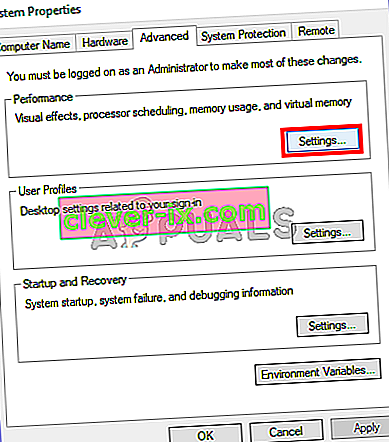
- In the advanced System Settings, click on the “Advanced” tab from the top.
- In the advanced tab, click on the “Settings” option under the “Performance” heading.
- On the next window that opens up, click on the “Data Execution Prevention” tab, and then select the “Turnon DEP for all programs except thoseI Select” option.
- After that, click on the “Add” option and point to the executable of the application that you are facing issues with.
- This way, that application will no longer come under the jurisdiction of the DEP program.
- Check to see if doing so has fixed the issue.


If the above process is unable to fix the issue, it might be because the executable isn’t the only one being affected by the DEP program. Sometimes the DEP might actually be preventing a herd of executables from being run on the computer and to counter this we will be disabling DEP completely.
Disabling DEP completely cannot be done through any Windows setting and it needs to be done manually through the command prompt. Remember to take this step as a last resort because this can in some cases makes your computer more vulnerable to viruses and malware attacks. In order to disable DEP through the command prompt:
- Press “Windows” + “R’ to open the Run prompt.
- Inside the Run prompt, type in “cmd” and then press “Shift” + “Ctrl” + “Enter” to launch in admin mode.
- Inside the command prompt, type in the following command and press “Enter” to execute it on your computer.
bcdedit.exe /set {current} nx AlwaysOff - Once the command has been executed, run the application that you want to and check to see if the error message still persists.
Method 10: Disable Firewall and Windows Defender
In some situations, the executable that you want to run on the computer might actually be blocked by the Firewall and it would not be able to make contact with its servers this way. Therefore, we will have to allow the executable in our Firewall for both public and private networks which should get it working if the Firewall is preventing it.
In addition to that, sometimes the Windows Defender might prevent the application from running on your computer because its local files might be suspicious and not properly signed. This can be due to a false alarm as well so we will be disabling the Windows Defender for the application as well by adding an exclusion. In order to do that:
- Press “Windows” + “R” to launch the Run prompt.
- Type in “ControlPanel” and press “Enter” to launch the classical control panel interface.
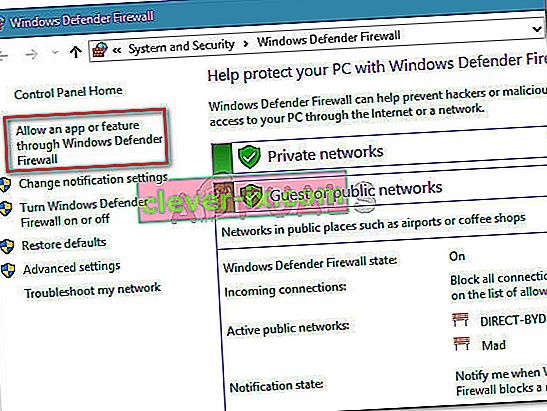
- Click on the “View by:” button, select “Large Icons” and then click on the Windows Defender Firewall option.
- Select the “Allow an app orfeature through the Firewall” button on the left pane and then click on the “Change Settings” button and accept the prompt.
- From here, make sure that you check both the “Public” and the “Private” options for the application and its entries.
- Save your changes and exit out of the window.
- After that, press “Windows” + “I” to launch the settings and click on the “Updateand Security” option.

- From the left pane, click on the “Windows Security” button and then click on the “Virus and Threat Protection” button.
- Select the “Manage Settings” button under the Virus and Threat Protection Settings heading.
- Scroll down and click on the “Add or Remove Exclusions” button in the next window.
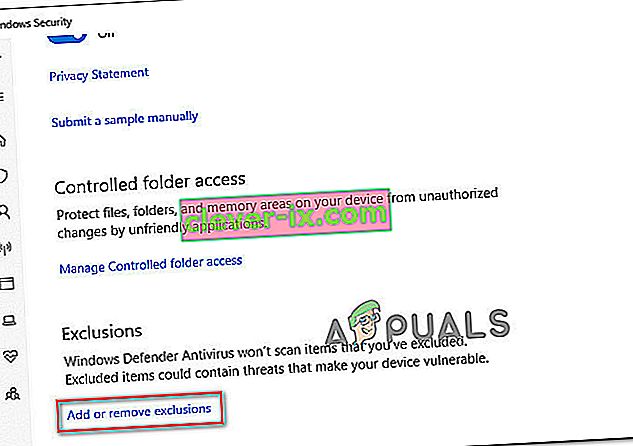
- Click on the “Add an Exclusion” option and select “Folder’ from the File type.
- Make sure to specify the application’s folder with which the issue is occurring and exit out of this window after saving your changes
- Check and see if doing so has fixed the error message.


Method 11: Reinstall Firefox
If you are getting this error while trying to launch Firefox, it might be occurring because the applications haven’t been installed properly on your computer. Therefore, in this step, we will be launching the app management window and uninstalling Firefox after which we will reinstall it completely by downloading it from the Firefox website. For that:
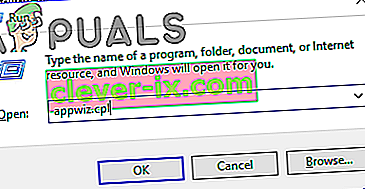
- Press “Windows” + “R” to open the Run prompt.
- Type in “appwiz.cpl” and press “Enter” to open the app management window.
- In the app management window, scroll down and right-click on the “Firefox” application.
- Select “Uninstall” from the list and then follow the on-screen instructions to remove the software from your computer.
- Repeat this step for all instances and bundled applications of the software installed on your computer.
- Make sure to disable any third-party antiviruses at this point to make sure that the software is installed smoothly.
- Head on over to the Mozilla website and click on the download button.

- Click on the downloaded executable and install it on your computer following the on-screen instructions.
- Check to see if doing so has fixed the error message on your computer.


Method 12: Scanning for Malware
It is possible in some cases that the computer has acquired malware that is preventing the user from being able to run all the system functions on their computer. Therefore, in this step, we will be using the default Windows Defender to scan our computer thoroughly for any viruses or malware that might’ve found its way on our computer. For that:
- Press the “Windows” + “I” keys simultaneously on your PC to open the Settings tab.
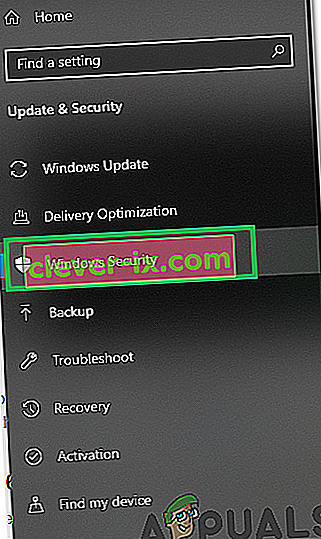
- Navigate to the Update& Security option and then click on the “Windows Security” button on the left tab.
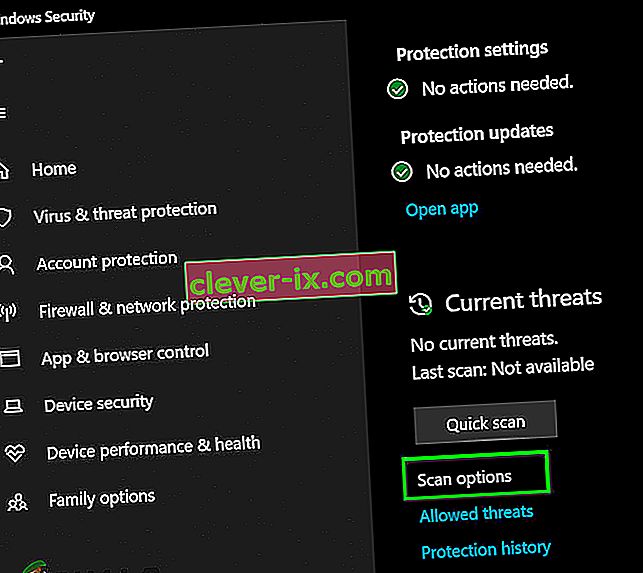
- After that, click on the “Open Windows Security” and select the “Virus and Threat Protection” option.
- After that, click on the “Scan Options” button below the “Quick Scan” window.
- Click on the “Full Scan” option and then hit the button of “Scan Now”.
- Wait for a few seconds while this process gets completed and then finally check if the error gets resolved now.


Microsoft Security Scanner is an additional tool that you can use to test the system for any further viruses and malware because sometimes the default tool isn’t able to perform the scan properly. Therefore, in this step, if the issue still hasn’t been resolved, we will be using the Microsoft Security Scanner to further make sure for any issues.
- Launch your browser and download the Microsoft Security Scanner from here.
- After downloading the executable, run it on your computer and let it install.
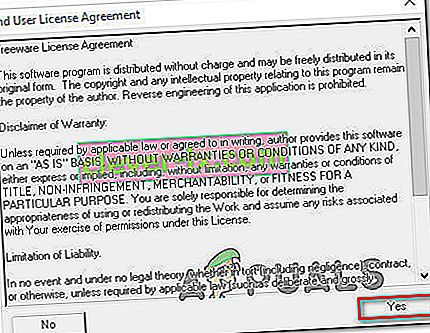
- Accept the License Agreement terms and click on “Next”.
- Select “Full Scan” and click on “Next”.
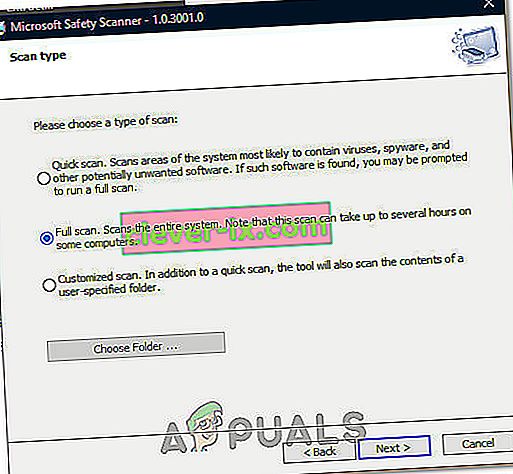
- After you opt for a full scan, the software will start scanning your entire computer to look for any malware or viruses that might’ve disguised themselves as normal executables or applications.
- After this scan has been finished, check to see if the error message still persists.


Method 13: Install Missing Drivers
It is possible in some situations that your device is missing certain drivers due to which this particular issue is being triggered on your computer. Therefore, we will be checking for any missing drivers and then we will check to see if the error is fixed. In order to do this, follow the guide below.
- Download Driver Easy on your computer.

- Run the downloaded executable and install the software on your computer.
- Run the check and see if there are any missing drivers on your computer.
- Install these missing drivers and then install them either manually or automatically using the Software.
- After installing all the missing drivers, check to see if the issue still persists.

Method 14: Reconfigure Registry
It is possible that in some cases, you haven’t properly configured all the registry settings or that you unknowingly configured something incorrectly. Therefore, in this step, we will be reconfiguring our Registry to fix a certain key that sometimes, if misconfigured, causes this particular error on Windows. In order to do this, follow the guide below.
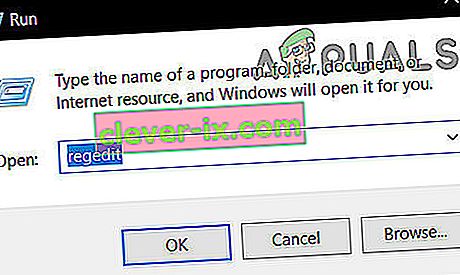
- Press “Windows” + “R” to open the Run prompt.
- Type in “regedit” and press “enter” to launch the registry editor.
- Inside the registry editor, navigate to the following location.
HKLM\SOFTWARE\Microsoft\Windows NT\CurrentVersion\Windows\AppInit_Dlls
- Double click on the “LoadAppInit_DLLs” entry on the right side of the screen.

- Change the value of this registry from “1” to “0”.
- Save your changes and exit the registry editor.
- Check to see if doing so has fixed the error.


Method 15: Update Disk Drivers
In some cases, the Disk Drivers that are being used to control your Storage and other Disks installed on the computer might have been outdated due to which the error is being triggered. Therefore, in this step, we will first be opening the Device Management Window and from there, we will be updating these drivers. In order to do so, follow the steps mentioned below.
- Press “Windows’ + “R” to open the Run prompt.
- Type in “Devmgmt.msc” and press “Enter” to launch the device management window.

- In the Device Manager, double click on the “DiskDrives” option to expand it.
- Right-click on the storage device listed and select the “Update Driver” option.
- Select the “Search Automatically for Drivers” option and let the setup search.
- If there are any drivers available, Windows will automatically check for them and install them on your computer.
- Check to see if doing so has fixed the issue.


Method 16: Disabling Automatic Updates and Uninstalling Updates
It is possible in some cases, that this error is stemming from a faulty update install. Microsoft is notorious for pushing out updates that aren’t properly customized to work for all hardware combinations and often go on to break things instead of making them better. Therefore we will make sure that the recent update isn’t installed on our computer.
In order to do this, we will have to first disable automatic updates on our computer and then we will be uninstalling the recently installed updates. Make sure to back up any important data that you don’t want to lose just in case this goes bad.
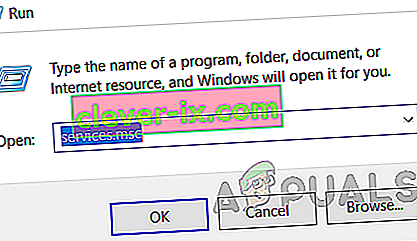
- Press “Windows” + “R’ to open the Run prompt.
- Type in “service.msc” and press “Enter”.
- Scroll through the list and double click on the “Windows Update” service.
- Click on the “Stop” button and then click on the “Startup Type” dropdown.
- Select “Disabled” from the list and select the “Apply” button from the window.
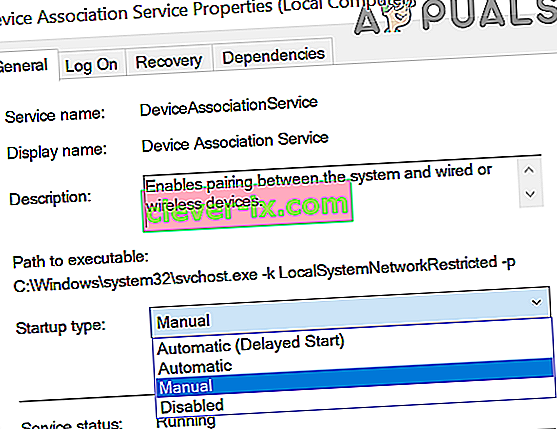
- Click on “OK” to close out of this window.
- Check to see if doing so has stopped your computer from updating.


After stopping the computer from updating, we will now be uninstalling the recent updates that have been installed on your computer. For that:
- Press “Windows” + “I” buttons to open the settings.
- In settings, click on the “Update and Security” option and then select the “Windows Update” button from the left pane.

- In the Windows Update, click on the “View Update History” option.
- In the Update History, click on the “Uninstall Updates” option and it should take you to the uninstallation screen where all the recently installed updates will be listed.
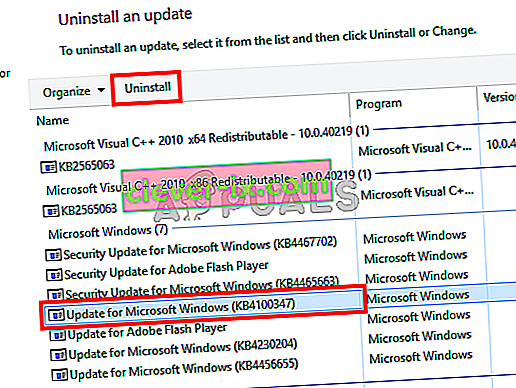
- From the list, right-click on the update that was installed recently and caused this error on your computer.
- Right-click on this update and select the “Uninstall” button to remove it completely from the computer.
- Follow through with the on-screen instructions.
- Check to see if uninstalling has fixed this issue.


Additional Fixes:
- In addition to some of the recommendations given above, you should try to check if there are any bad memory modules (RAM) installed on your computer which can be a cause of this.
- Inoltre, assicurati di controllare se non hai overcloccato la RAM a un livello oltre il limite consigliato. Se lo hai fatto, prova a riportarlo alle impostazioni di fabbrica e controlla se questo risolve il tuo problema.


